

准备工作
1.一台VPS(本教程使用VPS配置为1核1G,操作系统为Debian10)
2.把域名解析到VPS上(不会的请自行百度or谷歌,网上教程很多)
一.安装宝塔
官方脚本地址(请根据自己的系统选择相应的脚本):https://www.bt.cn/bbs/thread-19376-1-1.html
Debian安装宝塔:wget -O install.sh http://download.bt.cn/install/install-ubuntu_6.0.sh && bash install.sh
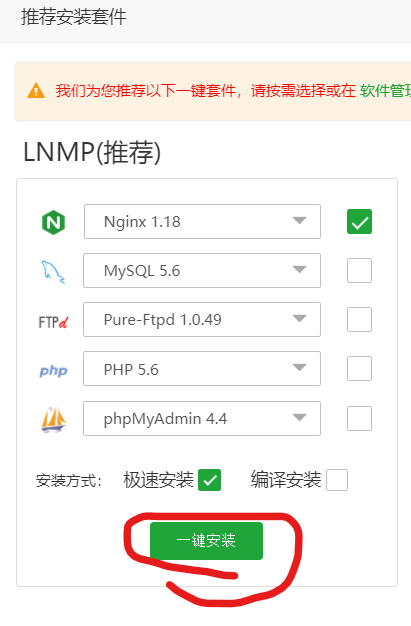
二.安装nginx
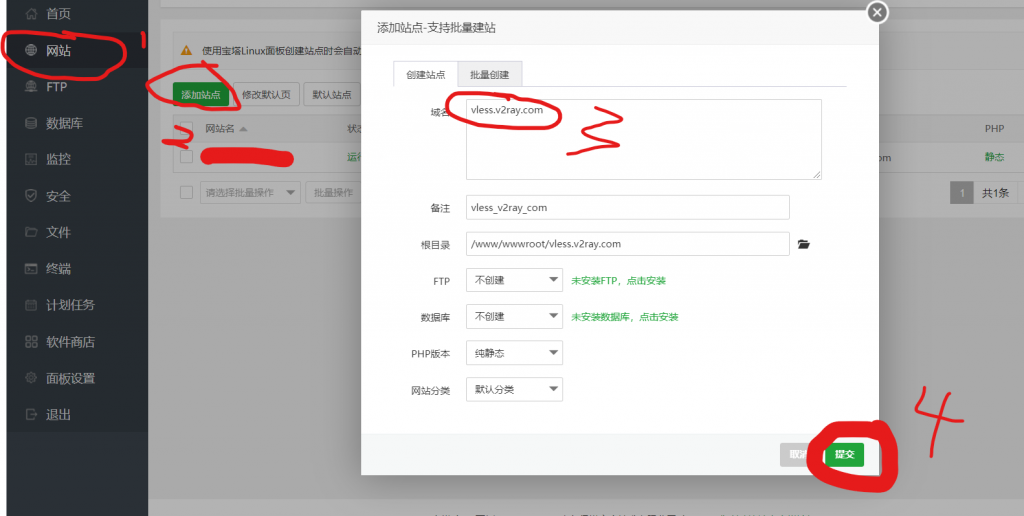
三.宝塔新建网站
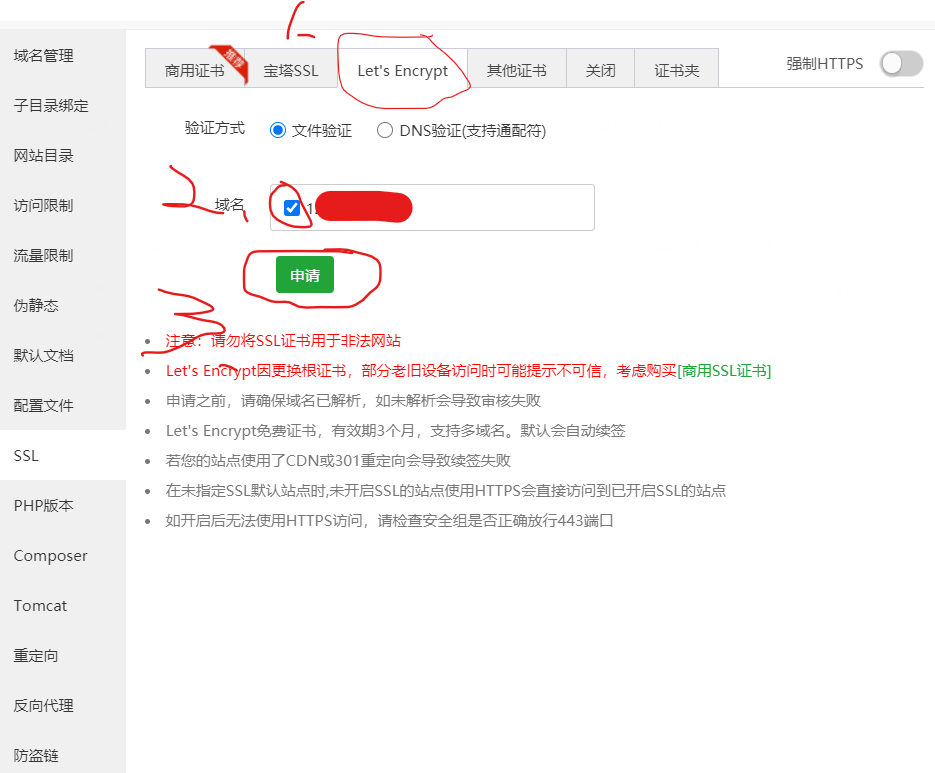
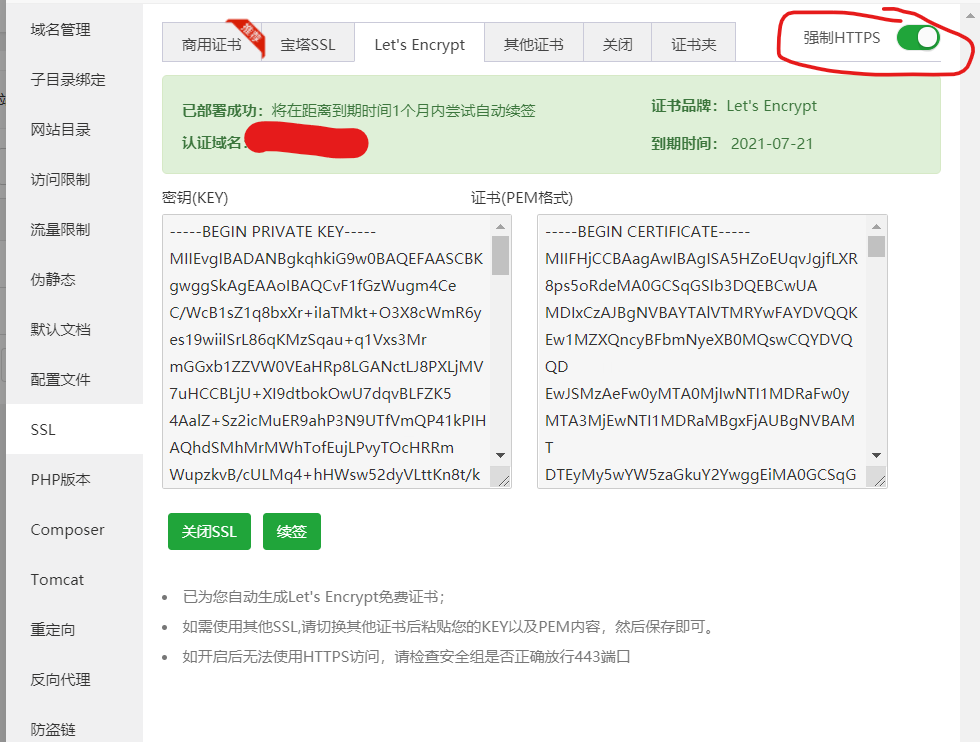
四.申请ssl证书

五.修改配置文件:
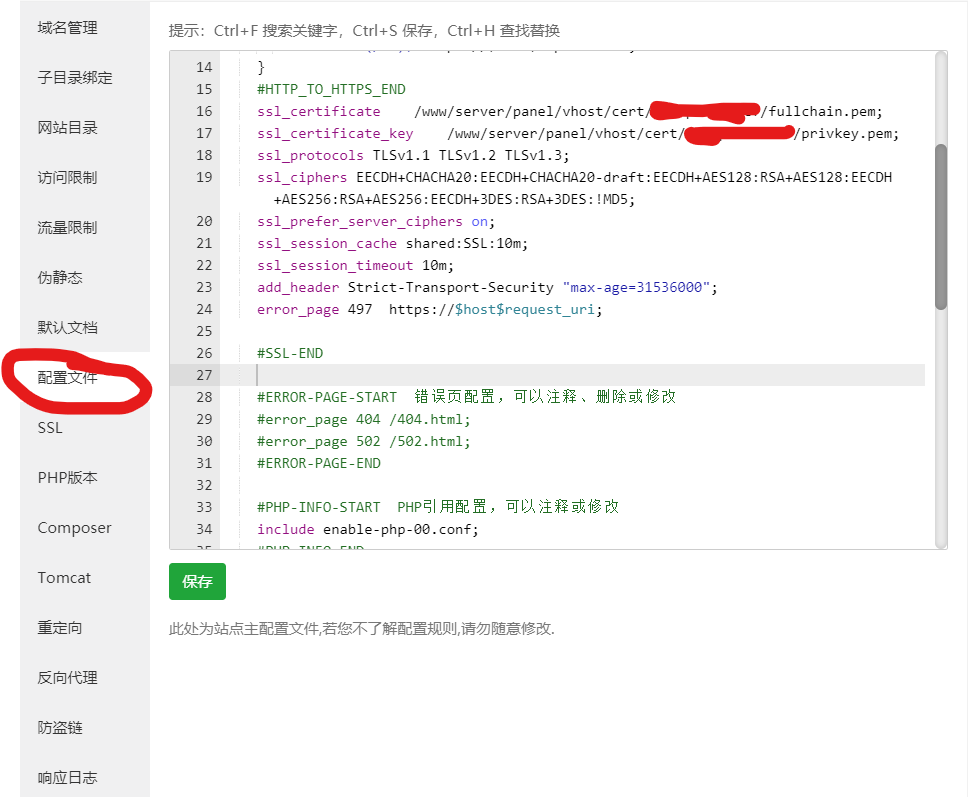
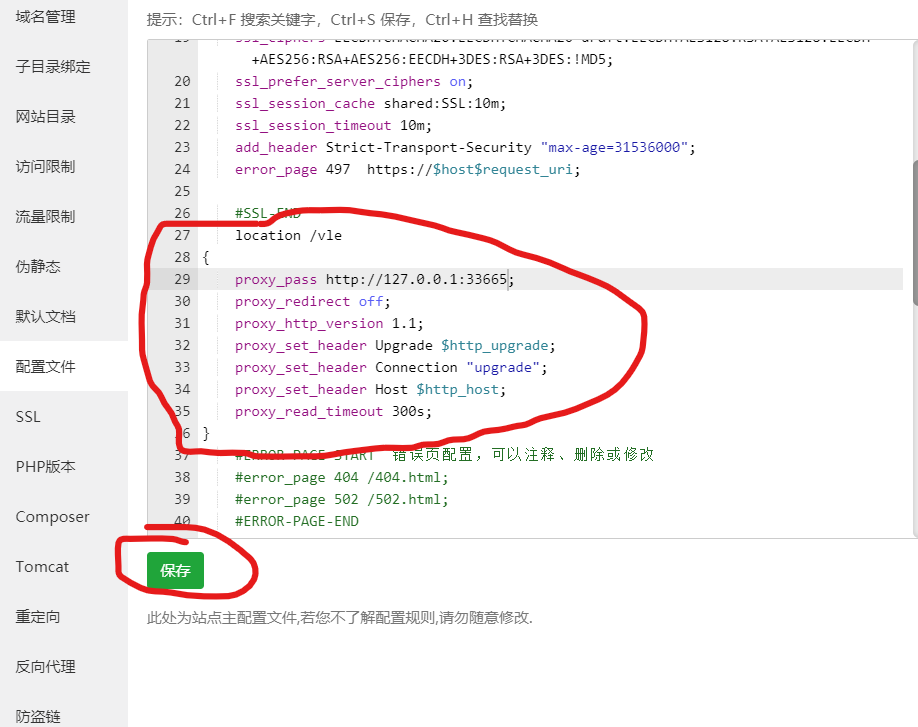
在配置文件内加入以下内容:
location /vle
{
    proxy_pass http://127.0.0.1:你的端口号;
    proxy_redirect off;
    proxy_http_version 1.1;
    proxy_set_header Upgrade $http_upgrade;
    proxy_set_header Connection "upgrade";
    proxy_set_header Host $http_host;
    proxy_read_timeout 300s;
}
加入后点击保存
安装v2ray
v2ray官方一键安装脚本(先执行1再执行2)
1.curl -L -s https://raw.githubusercontent.com/v2fly/fhs-install-v2ray/master/install-release.sh | bash
2.curl -L -s https://raw.githubusercontent.com/v2fly/fhs-install-v2ray/master/install-dat-release.sh | bash
如果脚本执行报错,需要安装curl:
centos:yum install curl -y
debian/ubuntu:apt install curl -y
启动v2ray:systemctl start v2ray
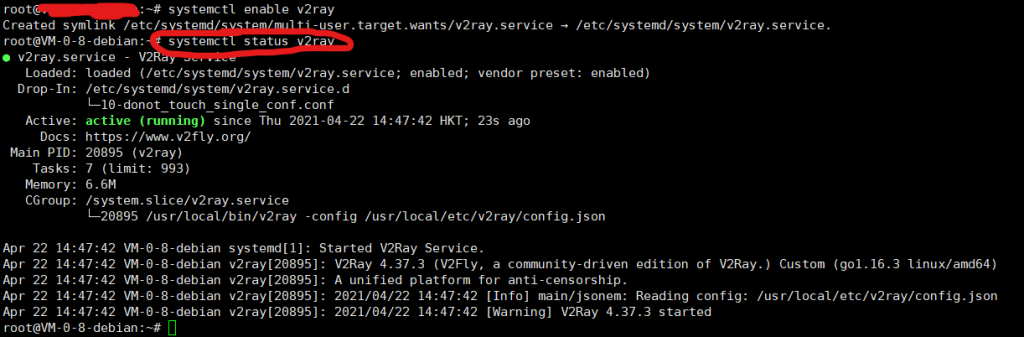
设置v2ray开机自启:systemctl enable v2ray
查看v2ray的状态:systemctl status v2ray
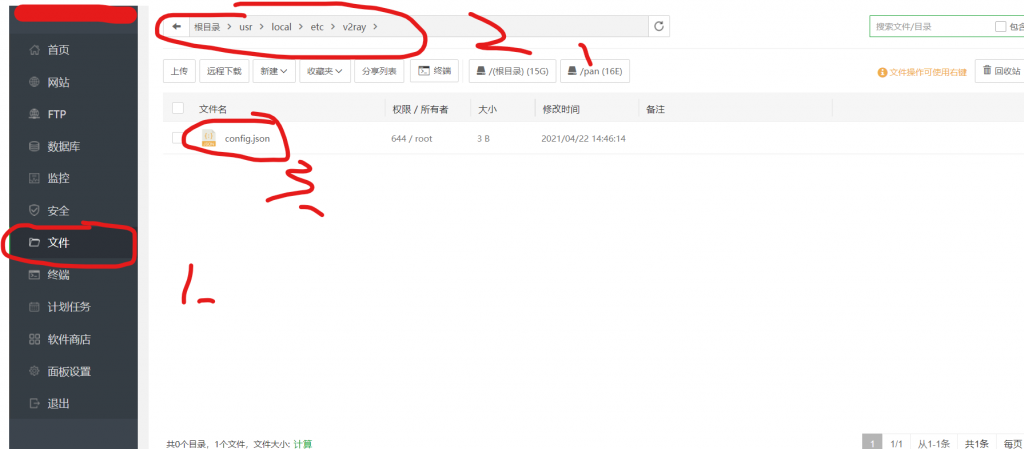
配置v2ray:
进入 /usr/local/etc/v2ray/ 目录,编辑 config.json 文件 将里面全部代码改为:
{
  "log": {
        "access": "/var/log/v2ray/access.log",
        "error": "/var/log/v2ray/error.log",
        "loglevel": "warning"
    },
  "inbounds": [
    {
    "port":你的端口,
      "listen": "127.0.0.1",
      "tag": "VLESS-in",
      "protocol": "VLESS",
      "settings": {
        "clients": [
          {
          "id":"你的 UUID",
            "alterId": 0
          }
        ],
            "decryption": "none"
      },
      "streamSettings": {
        "network": "ws",
        "wsSettings": {
          "path":"/vle"
        }
      }
    }
  ],
  "outbounds": [
    {
      "protocol": "freedom",
      "settings": { },
      "tag": "direct"
    },
    {
      "protocol": "blackhole",
      "settings": { },
      "tag": "blocked"
    }
  ],
  "dns": {
    "servers": [
      "https+local://1.1.1.1/dns-query",
          "1.1.1.1",
          "1.0.0.1",
          "8.8.8.8",
          "8.8.4.4",
          "localhost"
    ]
  },
  "routing": {
    "domainStrategy": "AsIs",
    "rules": [
      {
        "type": "field",
        "inboundTag": [
          "VLESS-in"
        ],
        "outboundTag": "direct"
      }
    ]
  }
}
修改以上配置文件并保存,注意下 "path":"/vle" 这一行,如果你没有修改过配置文件中的 pach 这里就是 vle
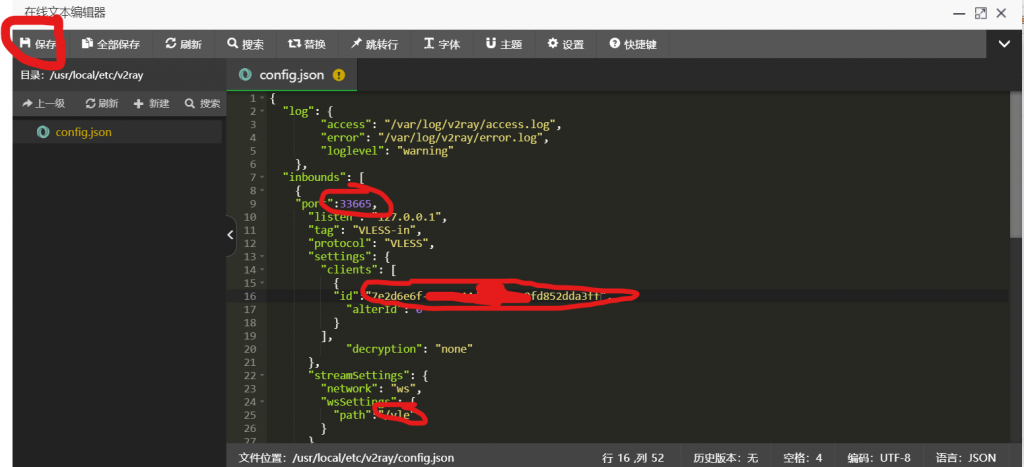
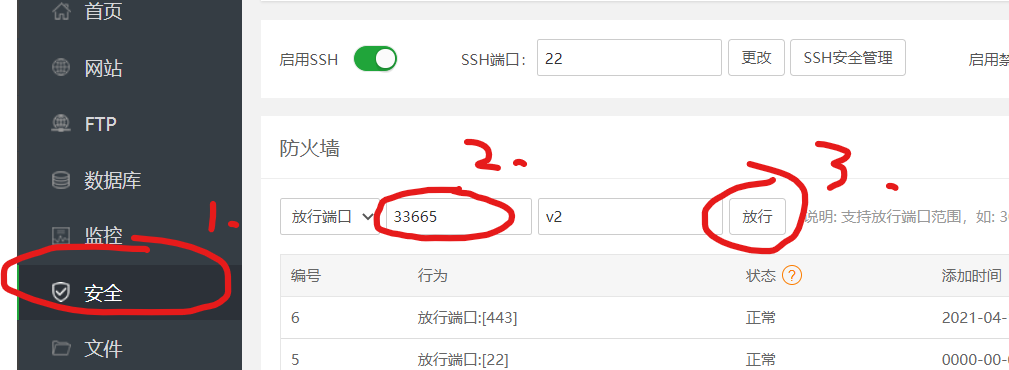
1.端口号
2.uuid(uuid可前往https://1024tools.com/uuid生成)
3.path
重启v2ray

systemctl restart v2ray
OK,大功告成

叨叨几句... NOTHING